 evomedia.net
Appearance
Shoot
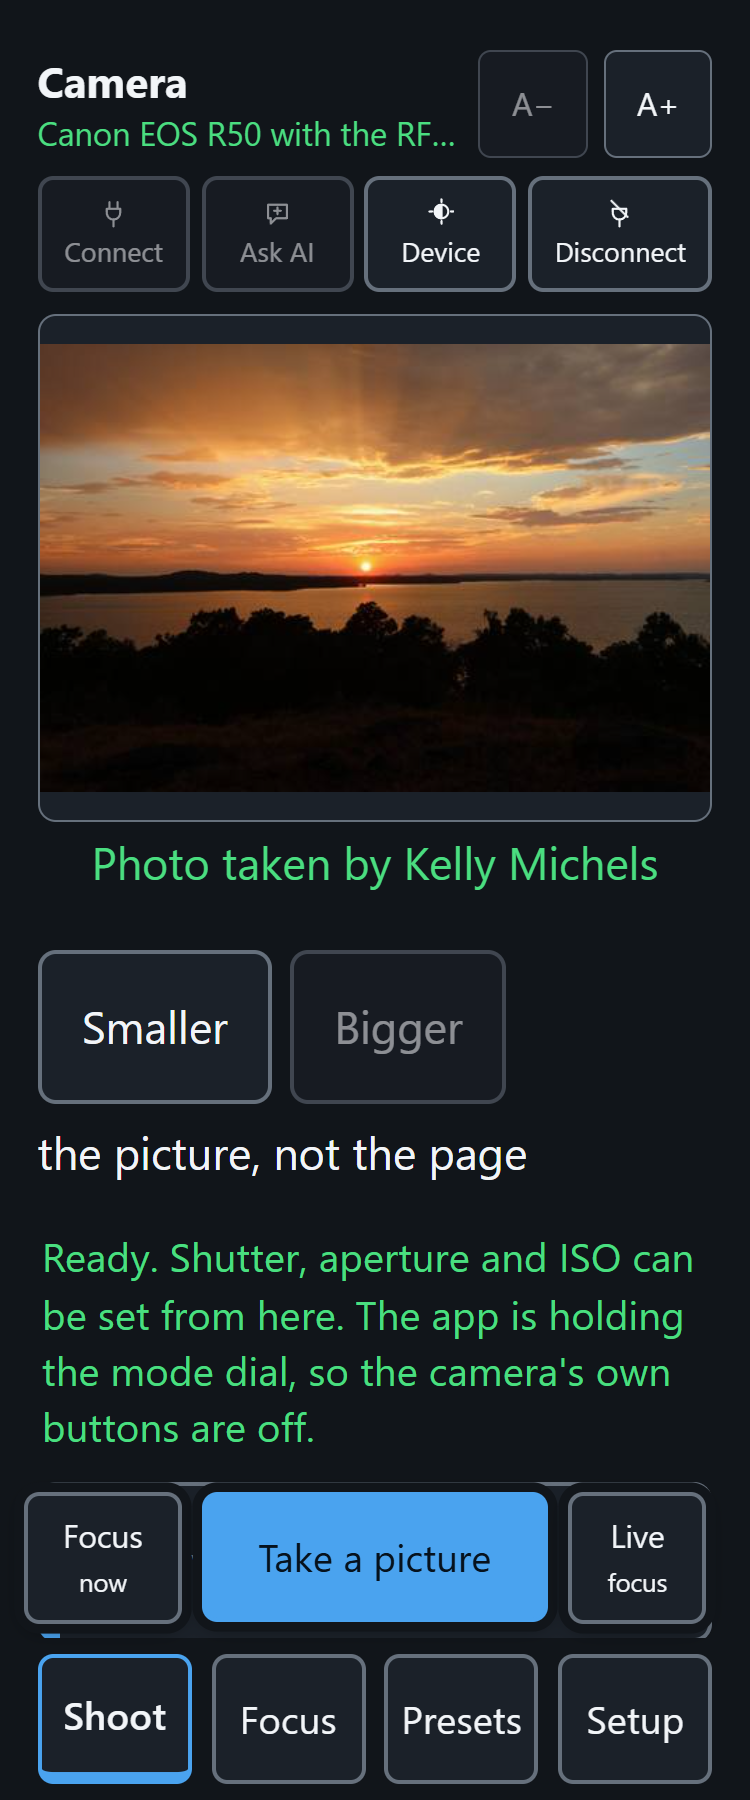
The section you take pictures from. Everything on it is a button with words in it.
Take a picture
Take a picture is the blue button in the middle of the bottom of every section, or the T key. The camera focuses first (unless it is in manual focus) and takes one picture, and the page says so.
Show what the camera sees puts the live picture above the controls, so the shot can be judged without walking to the camera. The controls stay reachable underneath it.
The three dials
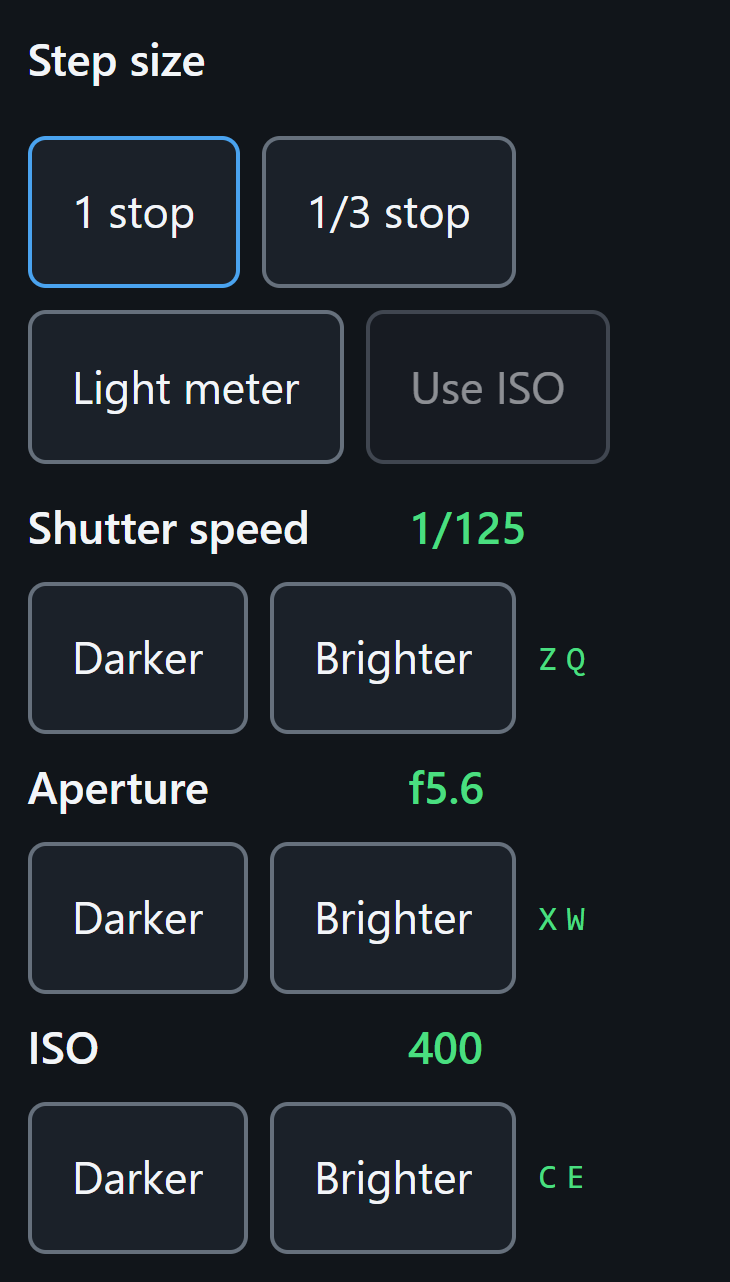
Shutter speed, aperture and ISO each have a row: the current value in green, and Darker / Brighter either side. Each press moves the value one step in the direction the word says, and the page reads back what the camera actually took.
Above them, Step size — 1 stop or 1/3 stop — is how far each press moves. The row of buttons lands in the same place whatever the step, so a target does not have to be re-found.
Only values the camera will accept right now are offered. A button that is not there is a value the camera would refuse — at the end of a lens's range, say — and a press that would fail silently is the one thing this page never offers.
The light meter
Two buttons, and the second one is the point.
Light meter reads the light through the camera and works out the ISO that would expose the picture correctly at the shutter and aperture you have already chosen. It changes nothing. It tells you the number and wakes up the button beside it:
The light reads ISO 1600. Press Use ISO 1600 to set it, or leave it as it is.
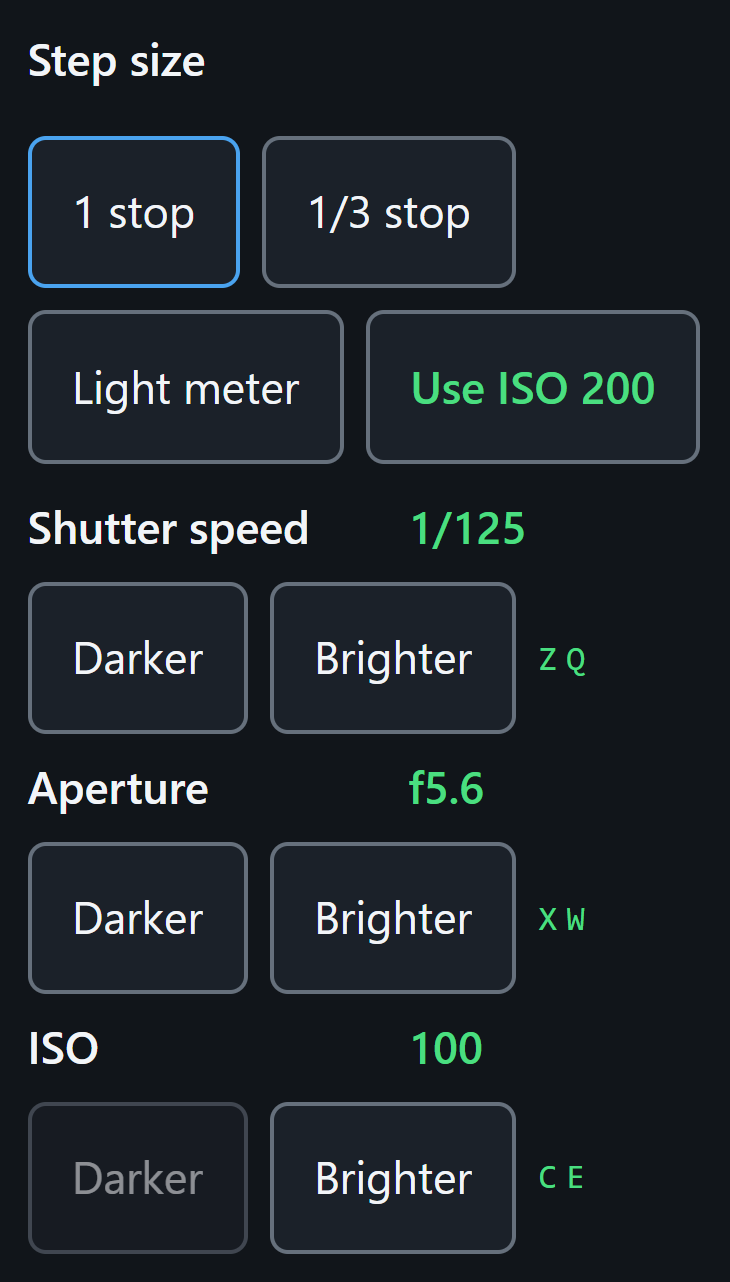
Use ISO 1600 then sets it, and only then. Until you press it the camera is exactly where you left it.
That separation is deliberate. What to do about the light is a decision, not a correction — somebody shooting for mood exposes differently from somebody shooting for detail, and an app that silently fixes your exposure is arguing with you about your own photograph. So the meter advises and you decide.
Why ISO. Shutter and aperture get picked for reasons the meter knows nothing about: how much movement you want frozen, how much of the scene you want sharp, what the lens will even do. ISO is what is left to carry the light, which is why a hand-held meter has always worked this way.
When it cannot help
It says so rather than guessing:
- Already exposed — nothing to recommend, and the Use button stays dead rather than offering the number you are already on.
- Past the camera's range — it still offers the highest ISO available, because that is the best answer there is, but it says the frame will still be short and by roughly how much. A different shutter speed or aperture makes up the rest.
- On bulb the buttons are not there at all. The live picture cannot show a held-open shutter, so there is nothing to read.
- No reading — a camera showing its own menu stops answering.
A reading goes stale
A recommendation describes one moment at one exposure. If you change the shutter or the aperture between the two presses, the ISO it worked out is for a photograph you are no longer taking — so it is refused rather than applied, and it asks you to meter again.
It cannot meter a night sky
The live picture will not show a shutter slower than about 1/30. Live view is a video feed and cannot show an exposure longer than its own frame, so past that point the histogram is of an exposure nobody is about to make. The meter still gives you a number and tells you to treat it as a starting point.
Which means the exposures that most need metering — the long ones — are exactly the ones it cannot read. That is why the astro presets carry computed exposures rather than metered ones.
Drive mode
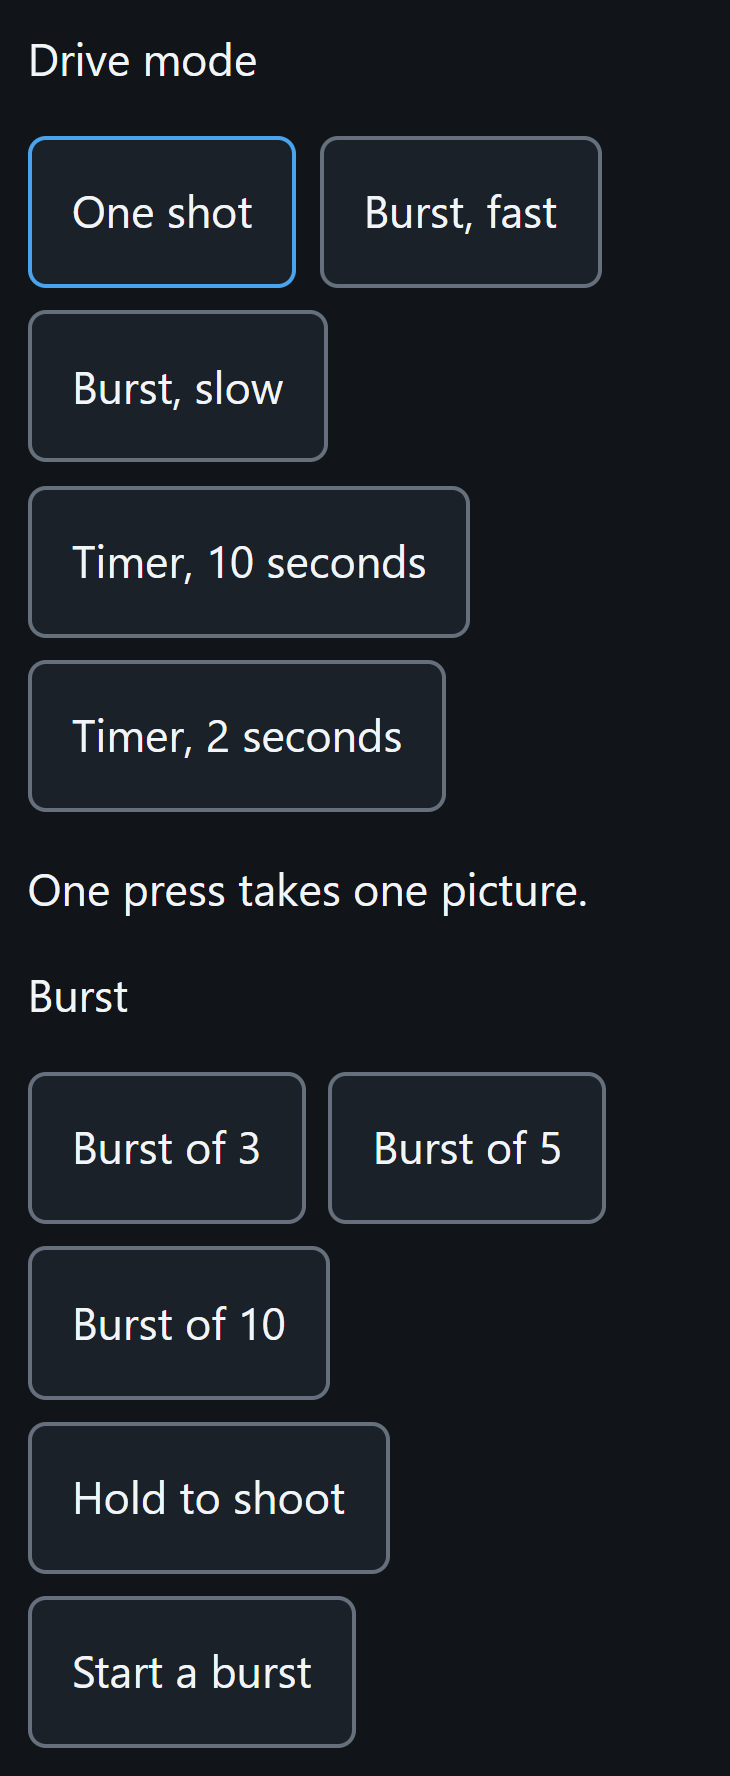
One shot, a burst (slow, fast, fastest), or a timer (2 seconds, 10 seconds, timer then a burst). It stays on Shoot because it changes between pictures.
Presets on Shoot
The first few presets — the hearted ones, in the order you arranged — sit on Shoot as one line each, so the setups you use most are one press away without leaving the section. Keys 1 to 9 press them. The full grid is on Presets.
Focusing before the picture
Beside the shutter:
- Focus now (left) — a half press of the shutter button, which is how a camera focuses. If the lens cannot find focus, the page says so, and it means it: this is the only call the camera makes that can report failure.
- Live focus (right) — press once to hold the half press, press again to let go. What that does is the camera's decision and the page says which: in One-Shot the lens locks where it is, so you can focus and recompose; in Servo it follows whatever it is pointed at; in AI Focus the camera chooses between the two.
Pressing the picture itself focuses on that spot and says where — Focused at the top left. See Focus.
A burst you do not have to hold
Burst of 3 / 5 / 10 on the Focus section: one press, and it stops itself after that many frames, counted from what the camera actually wrote. If the drive mode is not a burst mode, the button sets one first.
Start a burst is a latch — press to begin, press again to end — for a burst of whatever length you choose. Hold to shoot keeps going while the button is held, for anybody who prefers a held button; the page keeps telling the app it is still holding, and the app lets go by itself the moment that stops, so a phone carried out of range or a closed tab can never leave the shutter down.
A sequence, over time
A sequence takes a number of frames on its own, resting between them, and keeps going whether or not this page is still open.
Gap between is how long the camera rests after each frame. It is not padding: a sensor held open repeatedly gets warm, and a warm sensor is a noisy one. One second between thirty-second frames is the usual answer for star trails.
Sequence is how many. Press Take 10 and the app takes ten, counting what the camera actually wrote rather than what it was asked for, and says how far it got as it goes. Stop replaces the buttons while one is running.
The app is the thing keeping time, not the page — so the phone can sleep, the screen can lock, and the browser can be closed. A run that loses the camera for a moment waits for it and carries on rather than throwing away the rest of the night.
Bulb: exposures longer than 30 seconds
A Canon's longest timed shutter is 30 seconds. Anything longer is bulb, which is not a length at all — it means held open — so something has to decide when to close it.
Exposure picks the length: 30 seconds, 1, 2, 5 or 10 minutes. Bulb then opens the shutter, and the app closes it when the time is up. Buttons rather than a number to type, because typing a number one key at a time in the dark is exactly what this app exists to avoid.
The app times it, not the page. That difference matters: the phone can be in a pocket or asleep, and a ten-minute exposure still ends after ten minutes. While it runs, the choices are replaced by how long is left and one way to stop, because nothing else is safe to press with the shutter open.
Choosing a length also arms a sequence of them — set the length, then press Take 10, and you get ten of that exposure with the rest between them.
Long exposure noise reduction doubles the wait
If the camera's own long-exposure noise reduction is on, it shoots a matching dark frame after every exposure, so a four-minute frame costs eight minutes. The camera does not report that setting over its API, so the app cannot tell you — check it in the camera's menu before a long night.
Calibration frames for stacking
Stacking many frames together needs more than the pictures. The three kinds of supporting frame are one press each, and the app sets the shutter, takes them and puts your settings back.
- Flats want an even light rather than darkness, so an evenly lit twilight sky works and nothing has to be covered. They correct vignetting and dust, and they matter most on a wide lens near its widest aperture. Shoot them at the aperture and focus you are going to use, and then do not touch either.
- Bias frames want the shortest exposure the body has, which against a dark sky records nothing but the sensor's own floor.
- Darks want real darkness, and there is no way round it — the lens has to be covered. They are offered last and labelled as such, because a button you cannot use is worse than no button.
Take the pictures first: darks have to match the exposure and ISO the pictures were taken at, and the app reads those from what it just shot.
See what was shot lists the frames, so a set can be checked before the sky is packed up.
What the camera would not do
Every setting is checked against the camera's own list of legal values before it is sent. A preset that asks for something the mounted lens cannot do gets the nearest legal value, and the page says the difference in a sentence: Aperture: f4.5 instead of f2.8, 1 stop and 1/3 darker.